Redpanda

Redpanda is an open-source, Kafka-compatible streaming platform that uses C++ and Raft to replace Java and Zookeeper. Since it is Kafka compatible, it can be used with the QuestDB Kafka connector, providing an alternative data streaming option.

Prerequisites#

  • Docker
  • A local JDK installation
  • A running QuestDB instance

Configure and start Redpanda#

The Redpanda Quick start guide provides a docker-compose.yaml file that can be used. Copy and paste the content into into a file named docker-compose.yml on your local filesystem:

docker-compose.yml
---
version: "3.7"
name: redpanda-quickstart
networks:
redpanda_network:
driver: bridge
volumes:
redpanda-0: null
services:
redpanda-0:
command:
- redpanda
- start
- --kafka-addr
- internal://0.0.0.0:9092,external://0.0.0.0:19092
# use the internal addresses to connect to the Redpanda brokers'
# from inside the same Docker network.
#
# use the external addresses to connect to the Redpanda brokers'
# from outside the Docker network.
#
# address the broker advertises to clients that connect to the Kafka API.
- --advertise-kafka-addr
- internal://redpanda-0:9092,external://localhost:19092
- --pandaproxy-addr
- internal://0.0.0.0:8082,external://0.0.0.0:18082
# address the broker advertises to clients that connect to PandaProxy.
- --advertise-pandaproxy-addr
- internal://redpanda-0:8082,external://localhost:18082
- --schema-registry-addr
- internal://0.0.0.0:8081,external://0.0.0.0:18081
# Redpanda brokers use the RPC API to communicate with eachother internally.
- --rpc-addr
- redpanda-0:33145
- --advertise-rpc-addr
- redpanda-0:33145
# tells Seastar (the framework Redpanda uses under the hood) to use 1 core on the system.
- --smp 1
# the amount of memory to make available to Redpanda.
- --memory 1G
# the amount of memory that's left for the Seastar subsystem.
# For development purposes this is set to 0.
- --reserve-memory 0M
# Redpanda won't assume it has all of the provisioned CPU
# (to accommodate Docker resource limitations).
- --overprovisioned
# enable logs for debugging.
- --default-log-level=debug
image: docker.redpanda.com/vectorized/redpanda:v22.3.11
container_name: redpanda-0
volumes:
- redpanda-0:/var/lib/redpanda/data
networks:
- redpanda_network
ports:
- 18081:18081
- 18082:18082
- 19092:19092
- 19644:9644
console:
container_name: redpanda-console
image: docker.redpanda.com/vectorized/console:v2.1.1
networks:
- redpanda_network
entrypoint: /bin/sh
command: -c 'echo "$$CONSOLE_CONFIG_FILE" > /tmp/config.yml; /app/console'
environment:
CONFIG_FILEPATH: /tmp/config.yml
CONSOLE_CONFIG_FILE: |
kafka:
brokers: ["redpanda-0:9092"]
schemaRegistry:
enabled: true
urls: ["http://redpanda-0:8081"]
redpanda:
adminApi:
enabled: true
urls: ["http://redpanda-0:9644"]
ports:
- 8080:8080
depends_on:
- redpanda-0

Once the file is saved, run the following command to start a single Redpanda broker inside Docker and expose Redpanda to your host machine:

docker compose up

It also start the Redpanda web UI.

Download Apache Kafka#

Download Apache Kafka and unzip the file.

This step is required as Redpanda does not have its own Kafka Connect equivalent.

Download the QuestDB Kafka connector#

Download the QuestDB Kafka connector, under the zip archive named kafka-questdb-connector-<version>-bin.zip.

tip

You can automate downloading the latest connector package by running this command:

curl -s https://api.github.com/repos/questdb/kafka-questdb-connector/releases/latest |
jq -r '.assets[]|select(.content_type == "application/zip")|.browser_download_url'|
wget -qi -

Unzip the connector - it has a directory with 2 JARs: Copy these JARs into /path/to/kafka/lib:

unzip kafka-questdb-connector-*-bin.zip
cd kafka-questdb-connector
cp ./*.jar /path/to/kafka/libs

There should be already a lot of other JAR files. That's how you can tell you are in the right directory.

Configure properties#

Go to /path/to/kafka/config - there should be already quite a few *.property files. Create a new file: questdb-connector.properties with the following lines:

questdb-connector.properties
name=questdb-sink
connector.class=io.questdb.kafka.QuestDBSinkConnector
host=localhost:9009
topics=example-topic
table=example_table
include.key=false
value.converter=org.apache.kafka.connect.json.JsonConverter
value.converter.schemas.enable=false
key.converter=org.apache.kafka.connect.storage.StringConverter

In addition, pointing the open connect-standalone.properties and replace:

bootstrap.servers=localhost:9092

with the Redpanda broker URL:

bootstrap.servers=127.0.0.1:19092

Start Kafka Connect#

Navigate to the Kafka Connect folder and then run:

./bin/connect-standalone.sh config/connect-standalone.properties config/questdb-connector.properties

Now the Kafka Connect is initiated.

Send a message#

Open the Redpand UI topic page, http://127.0.0.1:8080/topics.It should display example-topic:

Screenshot of the Redpanda UI showing the example-topic

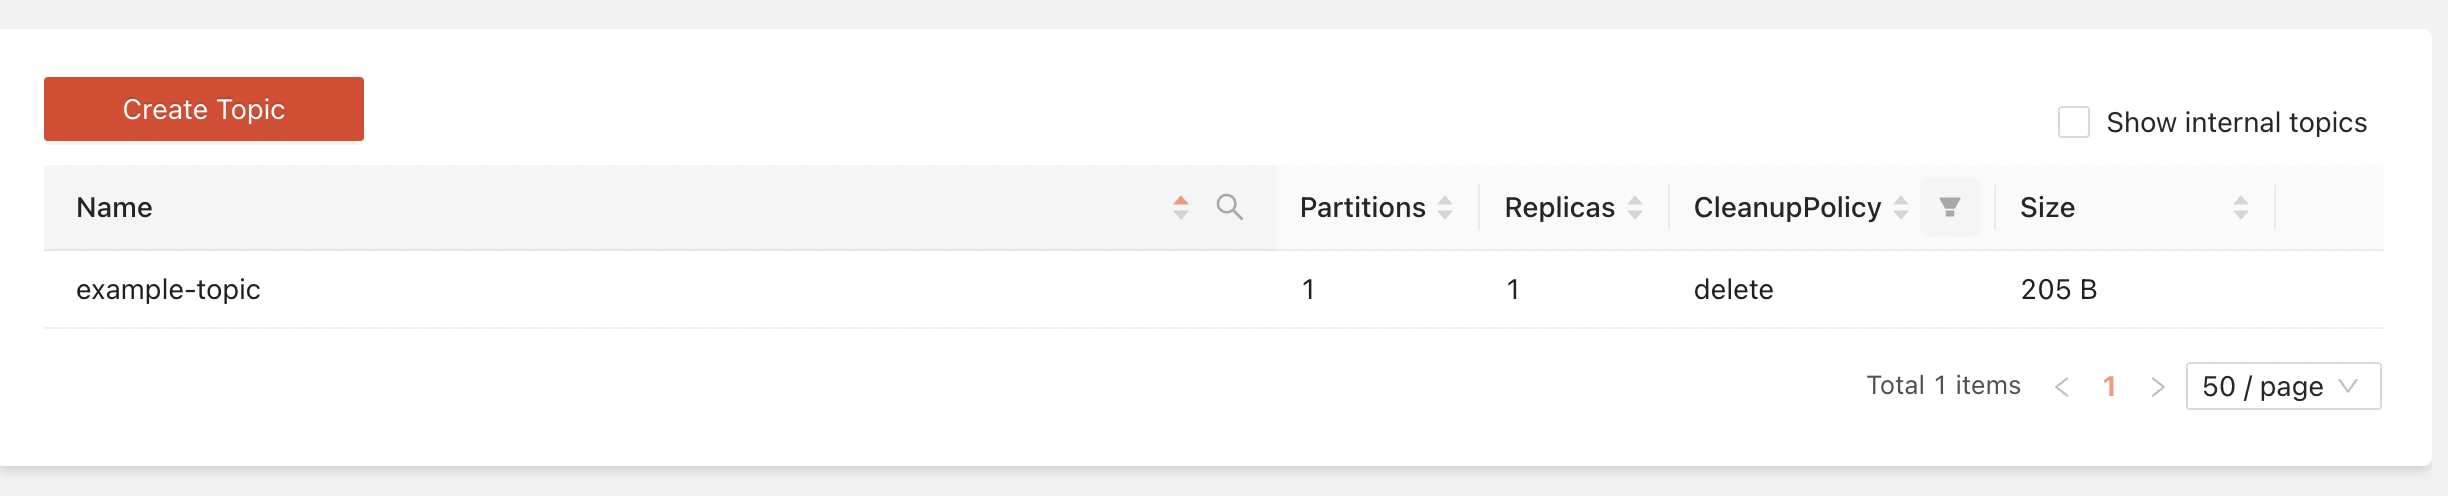
If the topic is not there then refresh a few times.

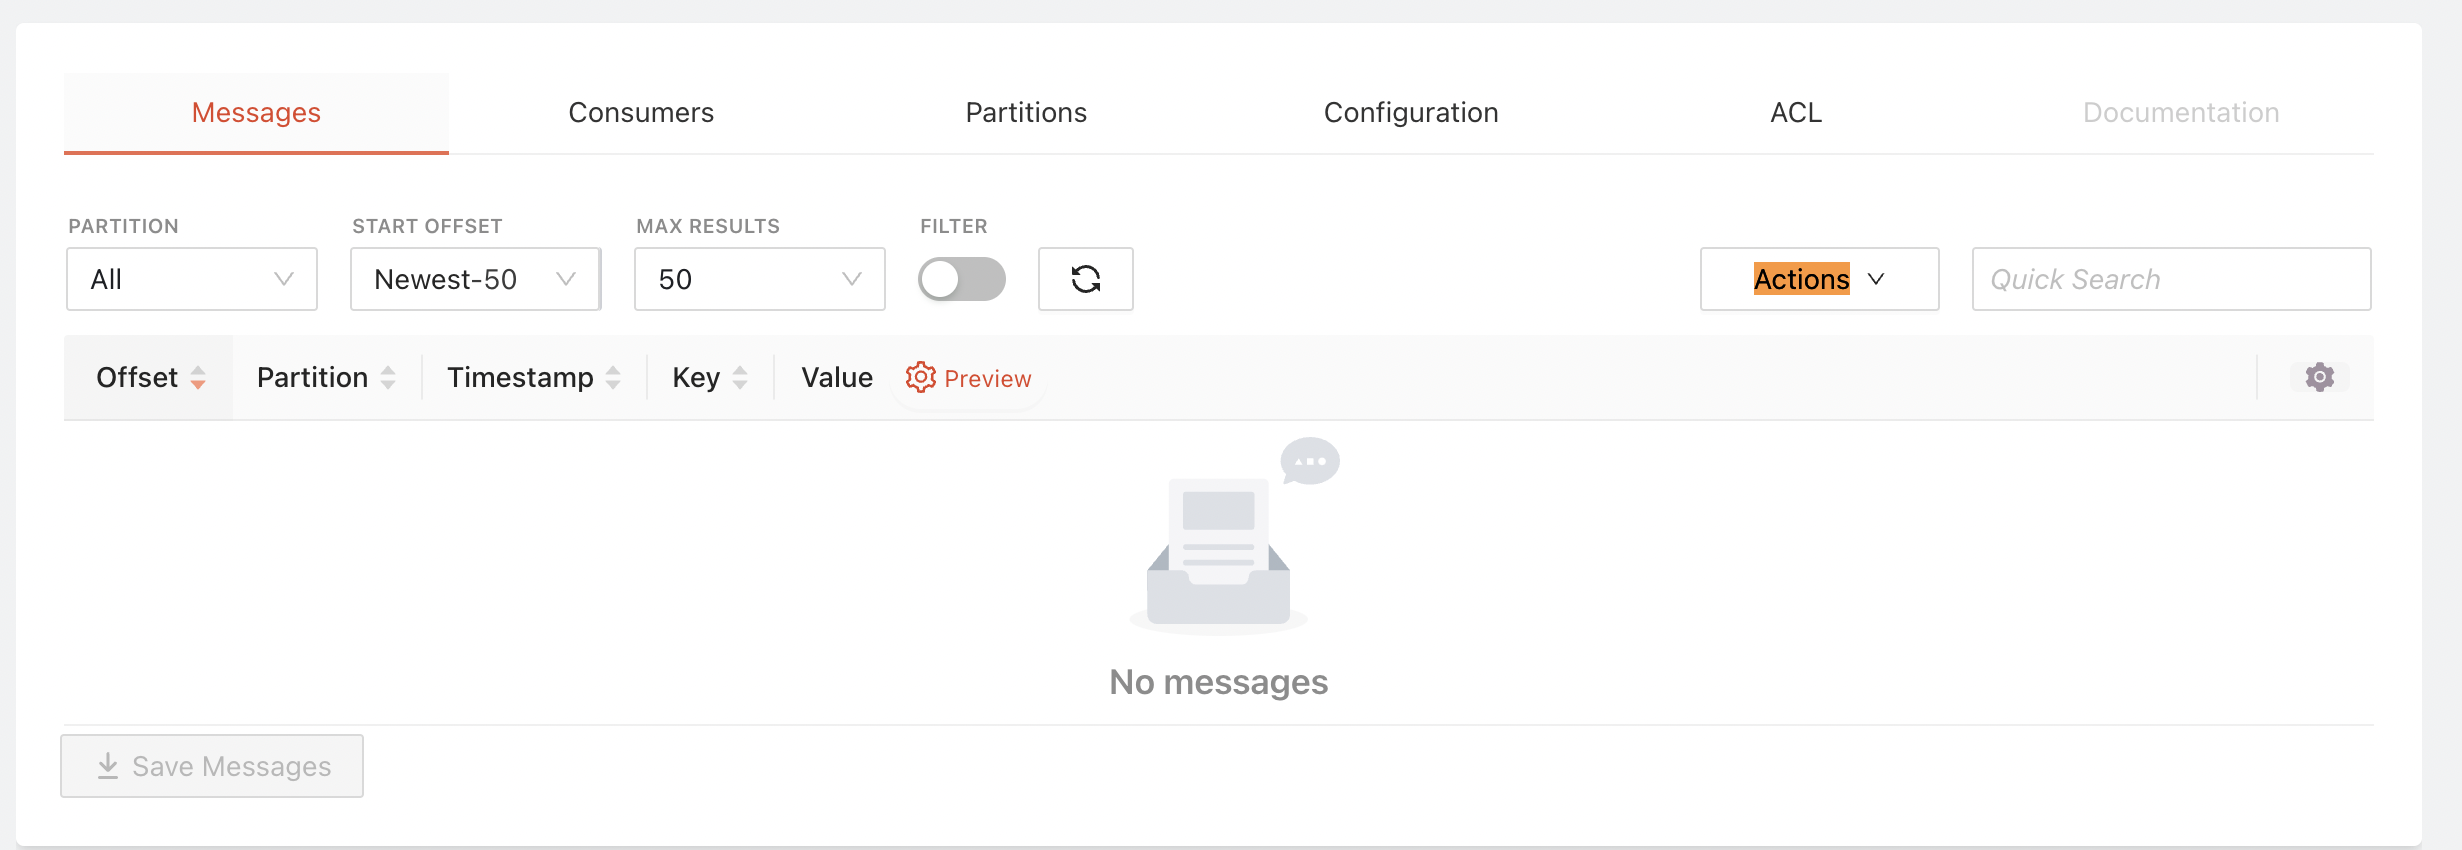
Select example-topic to expand more details and click Actions --> Publish Message:

Screenshot of the Redpanda UI highlighting the Actions button

Paste the following message into the message box:

{ "firstname": "Arthur", "lastname": "Dent", "age": 42 }

Screenshot of the Redpanda UI add message page

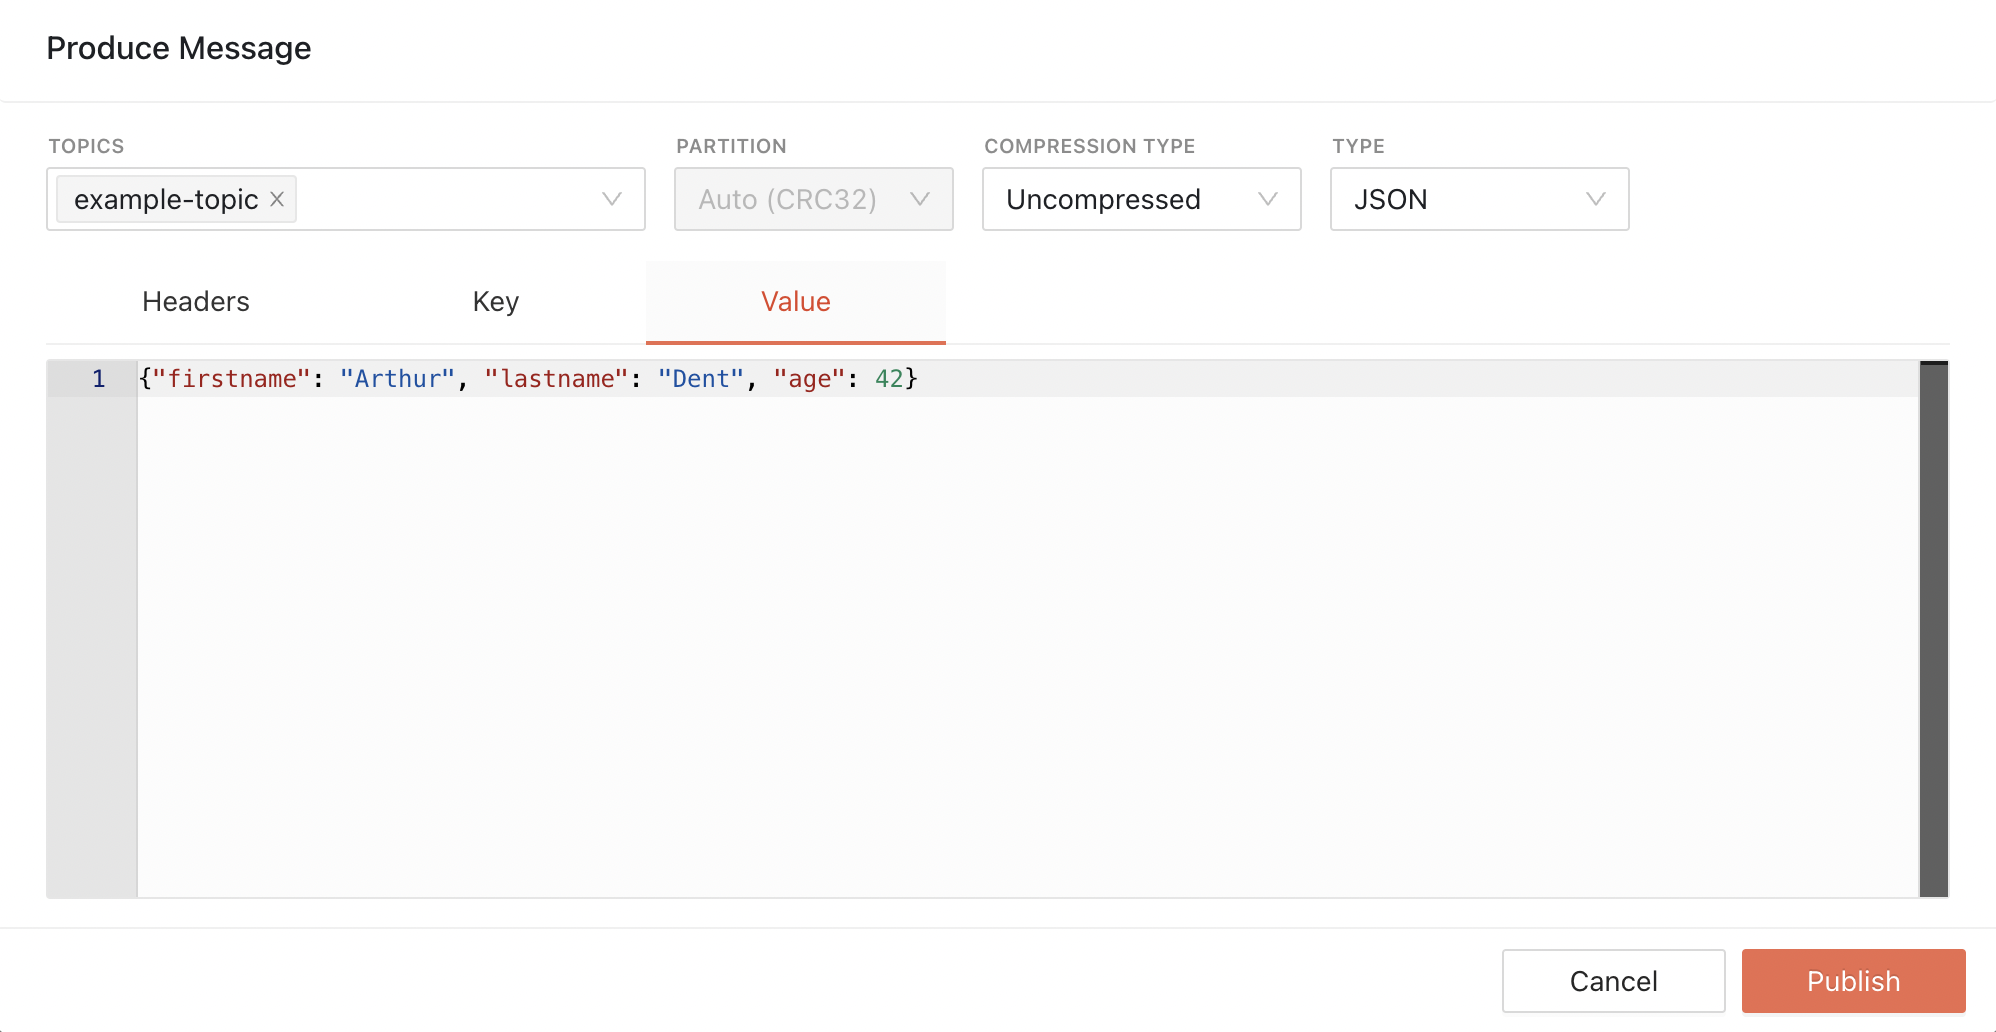
Then, click 'Publish'.

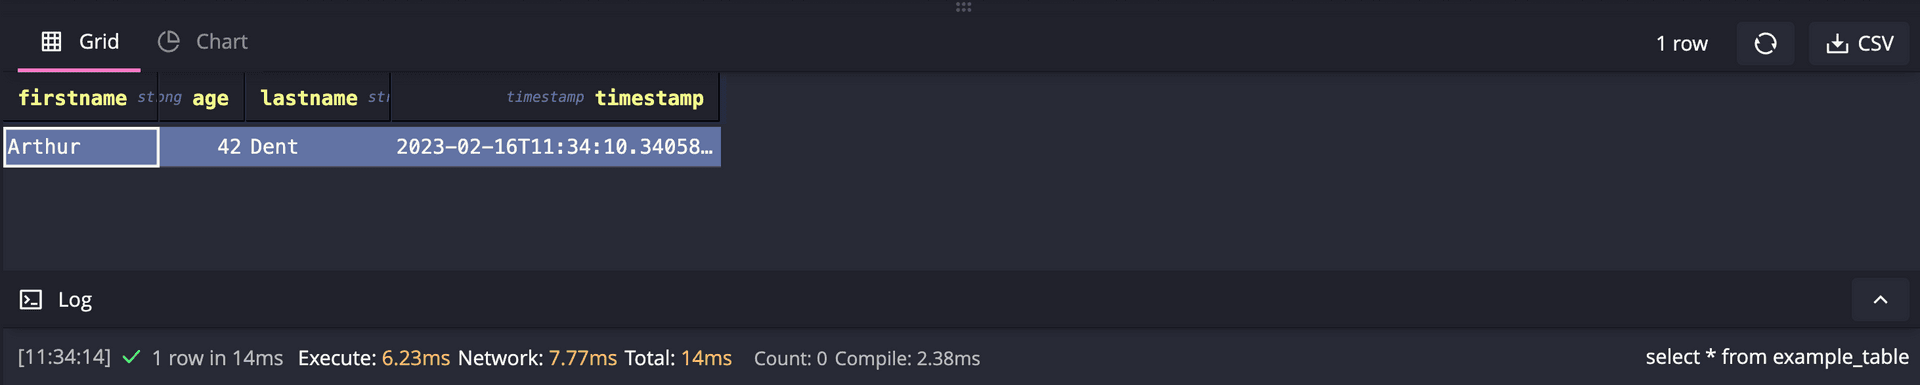
See result from QuestDB#

Go to QuestDB web console at http://localhost:9000/. Run a SELECT query:

SELECT * FROM example_table;

The message is delivered to QuestDB:

QuestDB web console result showing the Redpanda message

See also#